Turning Tactical Bags into Bicycle Panniers
Posted on December 1, 2019 • 8 min read • 1,506 words
Background
A little more than a year ago, I started bike-commuting to/from work when the weather was nice. I fought the Austin summer heat as best I could. And, now that it’s cooled, I’ve started riding fairly regularly (11-13 miles each way, 2-3 times/week). Up until last week, when I needed to carry my work laptop back and forth, I used a backpack. It was pain… literally. And, as fate would have it, a zipper broke last week requring that I look into either another backpack or investigate other options.
Need #1: I need a means to carry my laptop on the bike.
Since early last summer, I’ve longed to take a bikepacking trip. So far, life has gotten in the way of actually doing it, but it’s still a dream. When it came to commuting, I needed a way to carry my clothes and toiletries to work. For this, I got a now-discontinued Pika tailbag from Revelate Designs . The idea was for one bag to serve multiple purposes. I love this thing!
Need #2: Where possible, bikepacking gear needs to be functional for uses other than just bikepacking.
I started planning exactly what I would need to take on a bikepacking trip and how/where I would pack it. The issue I ran into is that my bike frame is too small for a useful frame bag. And I still needed a non-backpack way to carry my laptop. So… I opted for panniers.
I spent weeks researching various panniers from different companies, weighing price and functionality (and weight). I watched way too many YouTube vidoes about panniers and how they work out for bikepacking. What I found is that most panniers are so big that people tend to fill them up, totally weighing down the bike and reducing maneuverability and flexibility.
Need #3: Panniers need to be stricly in lieu of a frame bag and not big enough that I’ll be tempted to overfill them. The size/capacity of the bags will force the overall packing weight down.
Plus, all the decent ones were much more expensive than I wanted to pay.
Need #4: Cost needs to be reasonable (to me)
While searching for recommendations, I of course found many references to ‘just build your own’. Most of these involved attaching J-hooks and bungee cords, which didn’t really do it for me. But I happened across one forum post somewhere that pointed me to Ortlieb’s website ; specifically to the spare parts section, where I realized I could probably find bags that suited me and then attach Ortlieb’s well-known and respected hardware. Yay!
The next revelation: modular panniers! While browsing for various bags on Amazon, I kept seeing these tactical MOLLE bags with PALS grids for attaching smaller bags to larger ones very securely. I then thought: Why not get 2 small-ish bags to serve as a base, to which I can then attach additional smaller bags based on my needs at the time?
From here, I found the perfect solution(s). I found these 2 tactical hydration packs that were just the right size (one of the fits my laptop perfectly, and the other would have ample space for camping gear and most kitchen gear). And the fact that they were hydration packs meant both had separate pockets in the back to hold water bladders… where I would instead install a plastic reinforcement frame.
So… basically, here’s what I came up with:
- LytHarvest Hydration Pack - This one has a tall (~14") pocket, 1.5" deep, that just fits my laptop for work, and would be my main commuting pannier. It has an additional 1.5" deep pocket at the bottom half.
- Condor Hydration Carrier - This one has 2x 3" deep pockets.
- Stiffener Board and Foam Pad - This was made for a larger “assault pack”, but was easy enough to trim to size. I got 2 sets.
- Ortlieb Pannier Hardware - I searched for pricing, and the best I could find was at Universal Cycles. Here I picked up 2 sets of Ortlieb QL1 hooks, top rail and bottom rail. (I tried to get QL2.1, but currently Ortlieb is only making the top rails available for warranty repair/replacement.)
And with this, I’ve exceeded what I intended to spend. Total cost was about $160, for which I could have bought a nice pair of new, mid-level Ortlieb panniers. But alas, this is more fun and I am getting exactly what I wanted.
Tools Needed
- T5 Torx screwdriver
- Hex wrench
- 13mm box wrench
- Strong scissors
- Soldering iron
- I used (and ruined) a .2mm sharp conical tip
- Sharpie
- White colored pencil (or some other way to mark where holes will go on the bag fabric)
- Power drill with 7/8" drill bit
Step 1: Size the reinforcement plate
Take the plastic stiffener board and, with a sharpie, roughly trace around the sides bag to get a rough idea of the size. At this point, you don’t want to be perfect. Start big and leave some excess to trim later. Go ahead and cut off the sides.
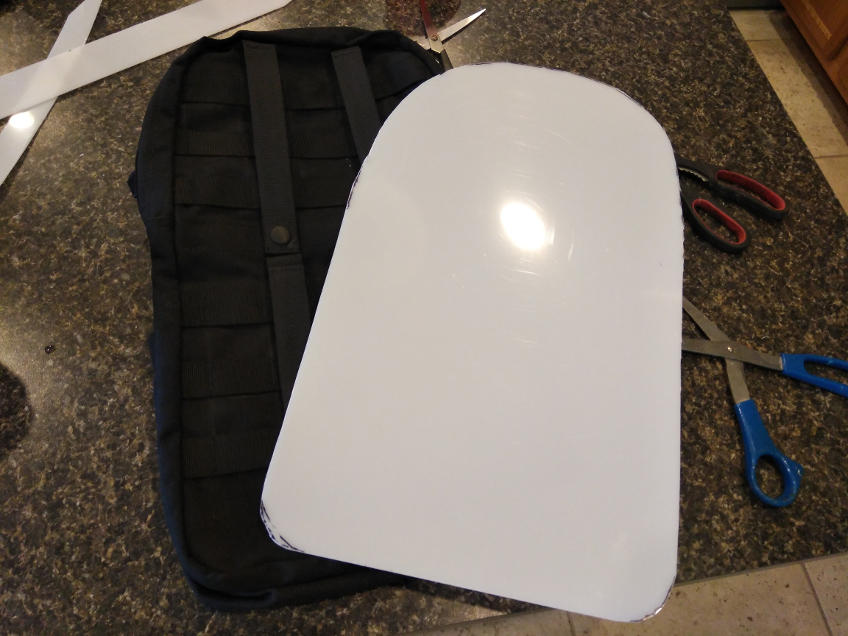
Try a test fit into the hydration section of the bag. If it’s too tight, trim little bits at a time off the sides until it fits horizontally.
Now, you’ve probably realized the bottom of your bag is curved, not sharp right angles. Go ahead and trim the bottom corners so that the plastic will slip all the way to the bottom of the bag. This should leave some excess sticking out of the top.
Again with the sharpie, trace or mark where to cut so that you get a nice, tight fit at the top. You want the top of the plastic plate to rest against the fabric of your bag. In other words, you want the weight of the bag to push down against the top of the plastic plate. (This will alleviate some of the weight on the fabric near the screw holes holding the pannier hooks).
You’ll see that, in my cast, I pulled out the little strips for holding the hydration bladder. In the event I ever want to use this bag for its intended purpose, I’ve retained that functionality.
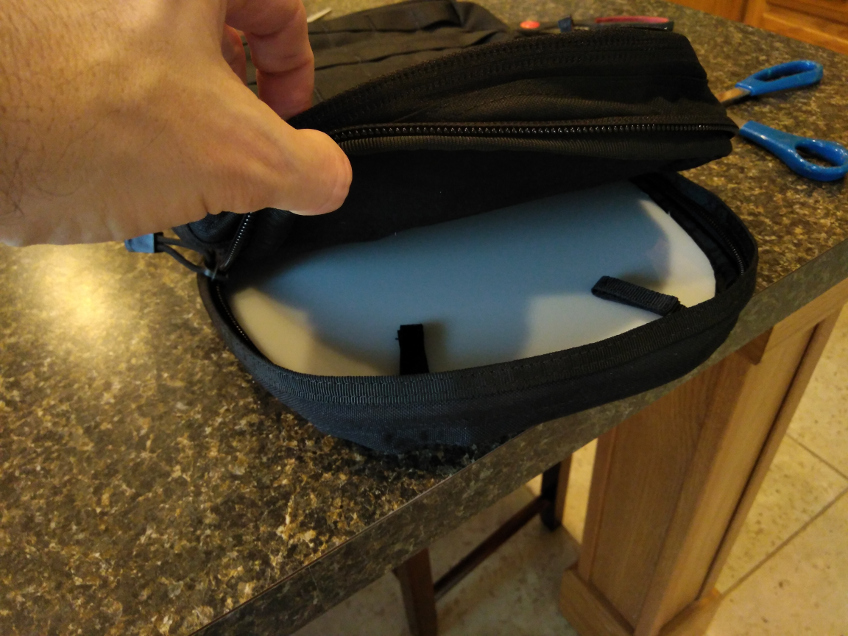
Step 2: Install the top pannier rail and hooks
Install the hooks onto the pannier rail. Don’t worry about tightening it down too much. Hang the rail to your bike rack and adjust the fore/aft position to your liking.
Now, hold your bag up to your bike rack to get an idea of how/where you want it positioned. Look to see where the rail will connect to the bag. In my case, since my bags have a MOLLE grid on the back, I positioned things so the rail screws would go through a layer of this nylon webbing for added reinforcement.
Once you know where you’ll position the rails, remove it all and go back to your table. Position the rail and, with your white colored pencil, mark your screw holes onto the fabric.
With the holes marked, and your plastic reinforcement plate securely in place, take your soldering iron and melt holes through your nylon fabric. Don’t get carried away and burn too far through, but burn deep enough to also mark the hole positions in the plastic plate.
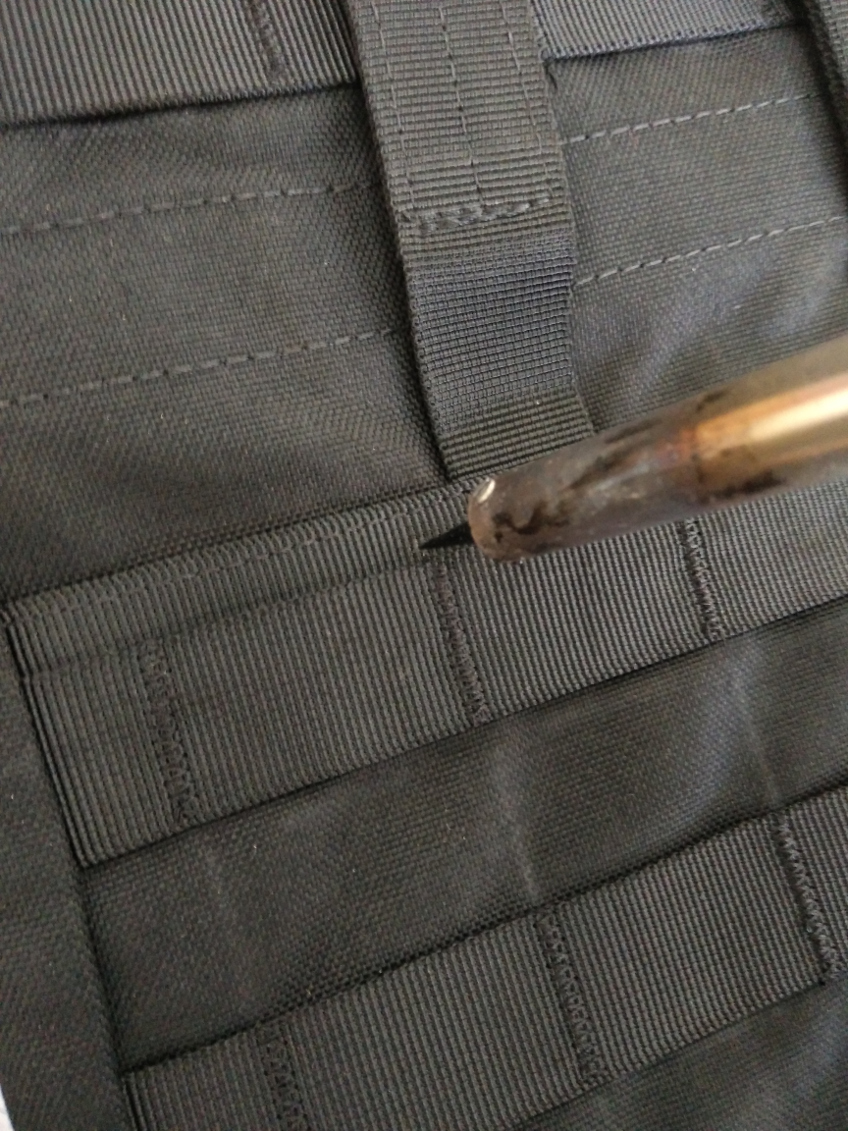
Remove the plastic plate from the bag. With your soldering iron, go ahead and make the holes in the bag big enough for the screws to fit through cleanly. The idea behind melting these holes is to prevent the nylon fabric from fraying. Ideally, the bag will be held on by the pressure between the rail and plate and where the bag rests against the top of the plate, and these screw holes will bear little weight themselves.
With your drill, drill holes in the plate all the way through.
Now, re-insert the plate into the bag and loosely attach the rail/hooks in position. Hang the back onto the bike rack.
Step 3: Install the bottom pannier rail
Just repeat the above process for the bottom rail.
NOTE: You could conceivably attach the top and bottom rail in a single go, but I prefer to split it into 2 steps so that I can measure the positioning for the bottom rail after the top is installed. I’m not being very exact, but any holes made are permanent. So take your time. Measure twice, cut once!
Done!
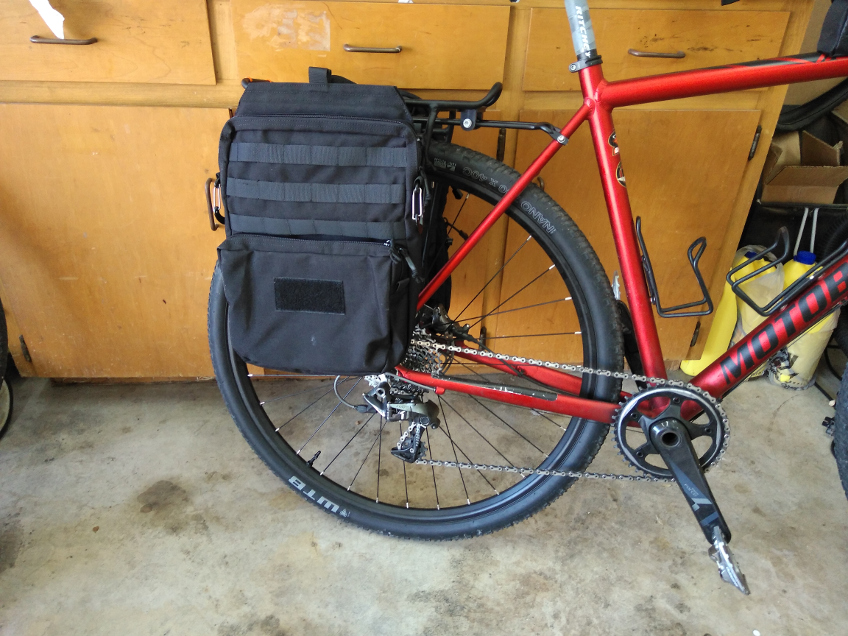
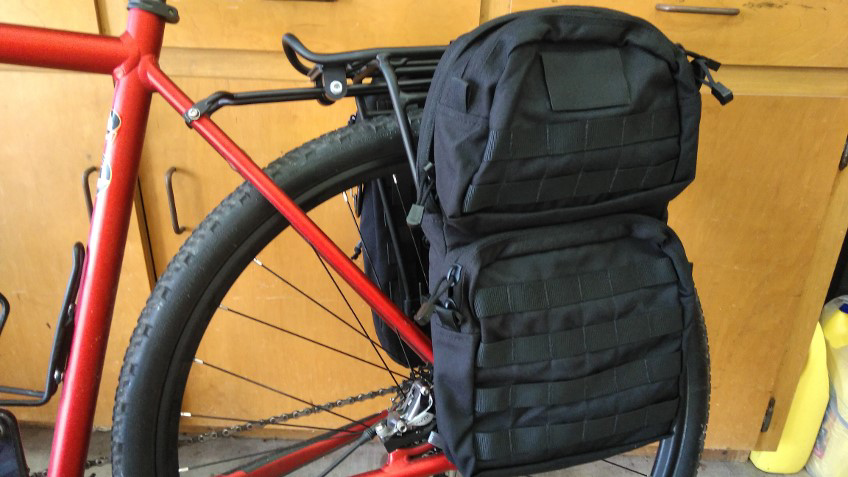
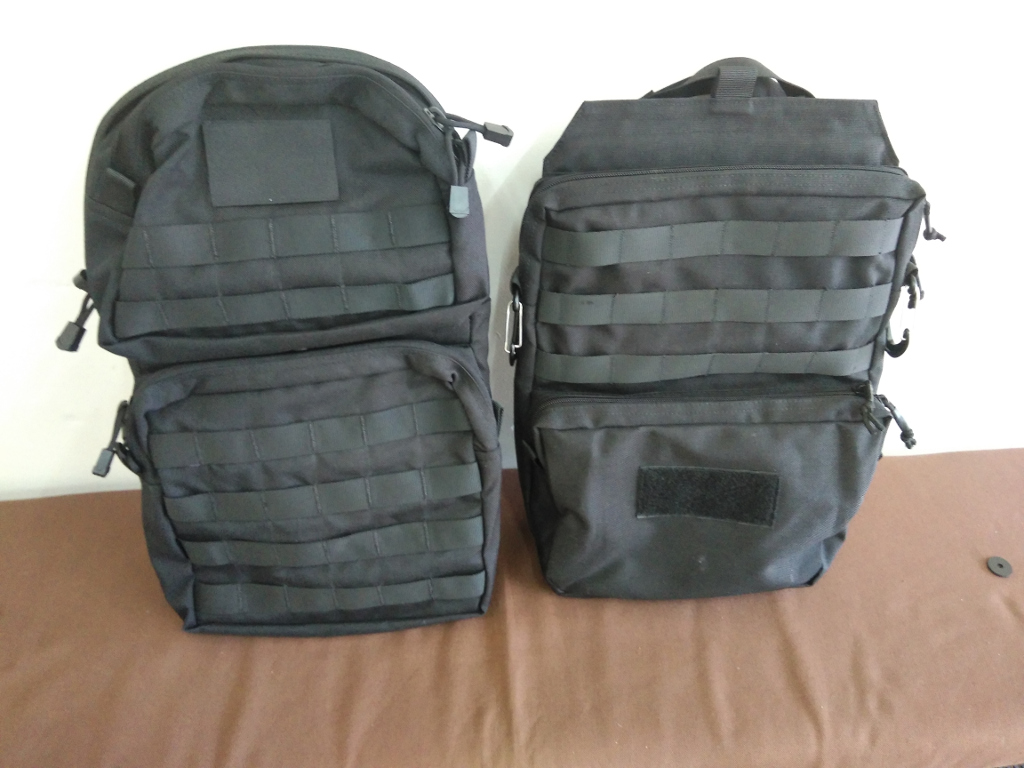
Both bags, from the front. The one of the left has 2 pockets, top and bottom. The one on the right has a long pocket (about 15") in the back for holding my laptop, plus the smaller one on the front/bottom.
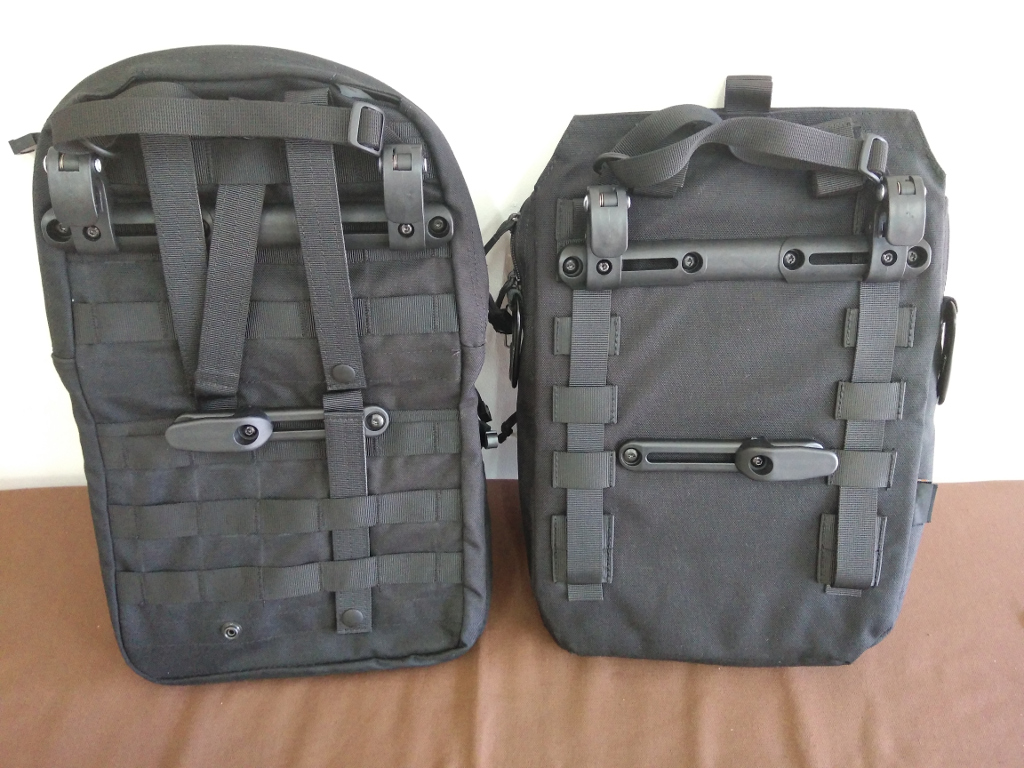
Both bags, from the back (with new hardware). Again to retain functionality for future use, I did my best to tuck the PALS straps out of the way and mount the rails under/around them.
Mounted…
